Emergency Light Size & Wattage Guide for Optimal Safety Choices
When it comes to emergency lighting, getting the right size and wattage isn’t just about brightness; it’s about making sure everyone can safely exit a building when the power goes out. The optimal choices depend on several factors, including the type of building, its occupancy, and the specific areas needing illumination. It’s a balance of meeting safety regulations without overspending on unnecessary power or having lights that fail to do their job. This guide will help you understand the practical considerations for selecting emergency lights that provide genuine safety and peace of mind.
Understanding Emergency Lighting Basics
Before diving into specifics, it’s helpful to grasp the fundamental concepts behind emergency lighting. This isn’t just about slapping a few battery-powered lights on a wall; it’s a carefully designed system intended to guide occupants to safety during a power outage or other emergency.
Purpose of Emergency Lighting
The primary purpose of emergency lighting is to ensure that people can safely exit a building in the event of a normal power supply failure. This means illuminating escape routes, open areas, and points of emphasis like fire alarm call points and exit doors. It prevents panic, reduces the risk of trips and falls, and allows occupants to locate and use fire safety equipment. Without adequate emergency lighting, even familiar surroundings can become disorienting and dangerous in darkness.
Key Types of Emergency Lights
There are a few common types of emergency lights you’ll encounter, each with its own advantages and suitable applications.
Self-Contained Emergency Luminaires
These are the most common type. Each luminaire has its own battery, charger, and control gear built into the fitting. When the main power fails, the internal battery automatically powers the light. They are generally simpler to install, as they only require a permanent live feed for charging. Their main drawback is that each unit’s battery needs individual maintenance checks.
Central Battery Systems
In larger or more complex buildings, a central battery system might be used. Here, a large battery bank powers multiple emergency luminaires throughout the building via dedicated wiring. While the initial installation can be more complex and costly, maintenance is centralized, and the batteries tend to have a longer lifespan. This system also allows for greater flexibility in terms of light output and duration for individual fittings.
Maintained vs. Non-Maintained
This distinction refers to how the emergency light operates under normal conditions.
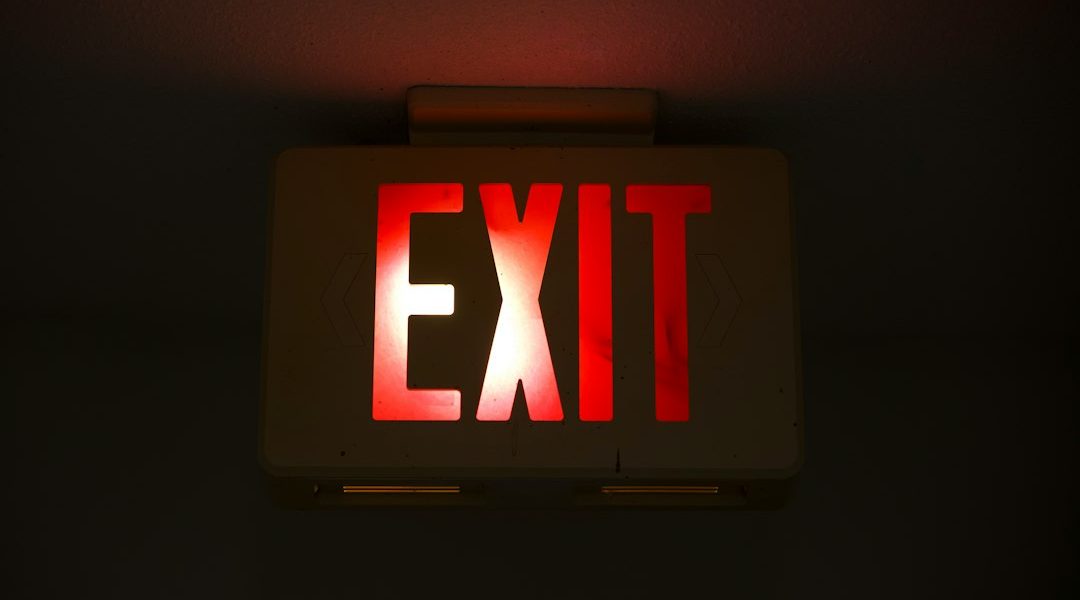
- Maintained: These lights are on all the time, either at full brightness or a reduced level, and remain on if the power fails. They are often used for exit signs or areas that require continuous illumination for safety, like stairwells.
- Non-Maintained: These lights only activate when the main power supply fails. They are typically used in areas where general lighting is sufficient during normal operation but emergency lighting is required for evacuation.
Determining Required Illumination Levels
The core of emergency lighting design revolves around providing sufficient light where and when it’s needed most. This isn’t a guess; there are specific standards to meet.
Regulatory Standards and Codes
Emergency lighting isn’t optional; it’s mandated by various building codes and safety regulations. In many regions, standards like NFPA 101 (Life Safety Code) in the US, EN 1838 in Europe, or local building codes dictate the minimum illumination levels, duration, and placement of emergency lights. These codes are in place to ensure a baseline level of safety. Failing to comply can result in fines, legal liabilities, and, most importantly, compromised safety during an actual emergency. It’s crucial to consult the specific codes applicable to your location and building type.
Measuring Illumination: Lux Levels
Illumination is measured in lux (lx). One lux is equal to one lumen per square meter. The standards will specify minimum lux levels for different areas during an emergency. For example:
- Escape Routes: Typically require a minimum average illuminance of 1 lux along the centerline of the escape route, with a minimum of 0.5 lux at any point on the centerline. Some codes might require 2 lux. The aim is to make sure people can clearly see the path ahead.
- Open Areas (Anti-Panic Lighting): For open areas larger than a certain size (e.g., 60 square meters) or with a high occupancy, anti-panic lighting is required to prevent panic and allow occupants to reach an escape route. This usually requires a minimum average illuminance of 0.5 lux, with a minimum of 0.1 lux at any point. The goal here isn’t detailed visibility, but rather to prevent total darkness and allow for initial orientation.
- High-Risk Task Areas: In areas where tasks involving potential danger to people are carried out, even during a power failure, emergency lighting needs to provide higher levels of illumination. This might be 10% of the normal operational lighting level, or a minimum of 15 lux, whichever is greater, to allow for safe shutdown procedures. Examples include machinery rooms or control panels.
Duration Requirements
Beyond brightness, emergency lights must operate for a specified duration. The most common requirement is 1 to 3 hours.
- 1-hour duration: Often acceptable for smaller buildings or areas where immediate evacuation is expected.
- 3-hour duration: More common for larger buildings, public venues, or where a longer evacuation or power restoration time might be anticipated. This duration provides a significant buffer.
The duration is critical because if the lights fail before everyone is safely out or the power is restored, their purpose is defeated. The specified duration should always be met, even at the end of the battery’s expected life.
Calculating Emergency Light Wattage and Number
This is where we get into the practical math. The goal is to select lights with enough wattage to meet the lux requirements and determine how many units are needed to cover the area effectively.
Lumens vs. Watts for Emergency Lights
Historically, we often talked about watts for brightness. However, for LED emergency lights, lumens are the more accurate measure of light output. Watts primarily tell you how much power a light consumes, while lumens tell you how much visible light it produces. A higher lumen output generally means more light coverage.
When choosing emergency lights, focus on the lumen output specified by the manufacturer, rather than just the wattage, especially with modern, efficient LED technology. A 3W LED emergency light might produce significantly more useful light than an older incandescent 10W equivalent.
Factors Influencing Light Placement and Quantity
Several factors dictate how many lights you need and where they should go:
- Room Size and Layout: Larger rooms or those with complex layouts (e.g., numerous partitions, odd angles) will require more lights to ensure uniform coverage.
- Ceiling Height: Higher ceilings mean the light spreads out more, but also diffuses more, potentially requiring higher lumen output or more fixtures to achieve the same ground-level lux.
- Obstructions: Pillars, machinery, or tall shelving can create shadows, necessitating additional lighting in those obscured areas.
- Reflectivity of Surfaces: Lighter-colored walls and floors will reflect more light, helping to increase overall illumination. Darker surfaces absorb light, making it harder to achieve the desired lux levels.
- Mounting Height: The height at which the light is mounted directly affects its spread. A light mounted too high might not provide sufficient intensity at ground level, while one mounted too low might create glare or uneven coverage.
Simple Calculation Approaches (Rule of Thumb)
While a full lighting design uses specialized software, a few rules of thumb can help with initial estimates:
- Exit Route Spacing: For escape routes, a common starting point is to space general emergency luminaires every 8-10 meters (25-30 feet) along the path. However, this is highly dependent on the light’s lumen output and the required lux level. Brighter lights can be spaced further apart.
- Open Area Coverage: For open areas, you might assume one emergency light can effectively cover a circular or square area of a certain diameter/side length. Again, this varies greatly by the light’s output. A 3W LED luminaire might cover a 5×5 meter (16×16 foot) area adequately for anti-panic lighting, but a detailed lux calculation is always best.
- Wattage for Smaller Spaces: For very small escape routes or individual rooms, a single 3W or 5W LED self-contained emergency light is often sufficient to meet minimum 1 lux requirements.
Using Lighting Design Software
For any significant installation, especially in commercial or public buildings, relying on professional lighting design software (e.g., DIALux, Relux) is highly recommended. These programs allow designers to:
- Input room dimensions, surface reflectances, and mounting heights.
- Import photometric data (IES or LDT files) for specific emergency light fixtures.
- Generate detailed lux level maps, showing exactly where the illumination meets or exceeds requirements.
- Optimize light placement and quantity to achieve compliance efficiently.
This software removes guesswork and ensures compliance, potentially saving money by avoiding over-lighting or costly retrofits due to under-lighting.
Choosing the Right Size and Wattage
Now that we understand the requirements, let’s talk about selecting the actual hardware. “Size” here refers to the physical dimensions and often correlates with the light’s output and battery capacity.
Matching Lumens to Lux Requirements
As discussed, focus on lumen output. Manufacturers will provide data for their emergency lights, often including a candela distribution curve or IES file, which describes how the light spreads. A fixture designed to illuminate a long corridor will have a different light distribution pattern than one designed for a large open area.
- For escape routes: Look for fixtures with a more directional beam pattern to focus light down the corridor. A higher lumen output (e.g., 100-200 lumens) might be needed to maintain 1 lux over longer distances.
- For open areas: Fixtures with a wider, more diffuse beam pattern are better for covering broader spaces. A lower lumen output per fixture (e.g., 50-100 lumens) might be acceptable if multiple fixtures are used to achieve the average 0.5 lux.
- For specific points: Lower lumen output (e.g., 20-50 lumens) might be sufficient for individual emergency exit signs, or to highlight a fire alarm call point, as long as it meets the localized lux requirement.
Battery Capacity and Duration
The wattage of the emergency light directly impacts the battery capacity required to achieve the necessary duration. A higher wattage light will drain a battery faster, meaning it needs a larger battery or more efficient power management to meet a 3-hour duration compared to a lower wattage light.
- Self-contained units: Manufacturers will specify the wattage and the corresponding duration (e.g., 3W LED, 3-hour duration). Ensure this meets your local code requirements.
- Central battery systems: The total load (sum of all emergency light wattages) will determine the size of the central battery bank needed. This is a complex calculation best handled by professionals.
It’s also important to consider the battery type. Lead-acid batteries are common but heavier and require more space. Ni-Cad (Nickel-Cadmium) are smaller but have specific disposal requirements. LiFePO4 (Lithium Iron Phosphate) batteries are becoming more popular due to their longer lifespan, lighter weight, and better environmental profile, though they can have a higher upfront cost.
Aesthetic and Environmental Considerations
While safety is paramount, practical choices also involve other factors.
Appearance and Integration
Emergency lights don’t have to be eyesores. Many manufacturers offer sleek, low-profile designs that blend into various architectural styles. Recessed emergency lights are available for a more discreet look. For historic buildings, there might even be specific requirements to minimize visual impact.
IP Rating (Ingress Protection)
The IP rating indicates how well a fixture is protected against solid objects (like dust) and liquids (like water).
- IP20: Suitable for dry, indoor environments.
- IP44: Protected against splashing water and objects larger than 1mm. Good for bathrooms or sheltered outdoor areas.
- IP65/IP66: Dust-tight and protected against water jets. Essential for dusty industrial environments, car parks, or exposed outdoor locations.
Always choose an IP rating appropriate for the environment where the light will be installed to ensure its longevity and reliable operation.
Temperature Ratings
Emergency lights, especially their batteries, are sensitive to temperature. High temperatures can shorten battery life, while very low temperatures can reduce their capacity and discharge duration. Ensure the fixture’s operating temperature range is suitable for its intended location (e.g., cold storage, boiler room, outdoor).
Installation and Maintenance Best Practices
Even the best emergency lights won’t serve their purpose if they’re not installed correctly and regularly maintained. This section is all about keeping them in tip-top shape.
Proper Installation Techniques
Correct installation is non-negotiable for reliable operation.
- Follow Manufacturer Instructions: This seems obvious, but it’s the first step. Each fixture may have specific wiring or mounting requirements.
- Adhere to Wiring Codes: All electrical work must comply with local wiring regulations (e.g., National Electrical Code in the US, BS 7671 in the UK). This includes proper cable sizing, conduit use, and earthing.
- Strategic Placement:
- Escape Routes: Place lights at changes of direction, at intersections of corridors, within 2 meters (6.5 feet) of each escape door, fire alarm call point, first aid point, and fire-fighting equipment. Ensure even illumination along the entire path.
- Open Areas: Distribute lights to provide uniform anti-panic lighting, avoiding dark spots.
- Stairwells: Illuminate each landing and the run of stairs.
- High-Risk Areas: Position lights to illuminate specific machinery or control panels.
- Mounting Height: Install at the recommended height. Too high can diminish ground-level lux; too low can cause glare or be prone to damage.
- Avoid Obstruction: Ensure nothing will block the light’s beam, such as open doors, tall furniture, or signage.
Regular Testing and Inspection
Emergency lighting systems are critical safety equipment, and their reliability hinges on consistent testing. This isn’t just a recommendation; it’s a legal requirement in most jurisdictions.
Daily/Monthly Checks (Visual)
- Daily/Weekly: A quick visual check (often done by building occupants or maintenance staff) to ensure indicator lights are green (indicating mains power and charging). Any red lights usually mean a fault.
- Monthly: A short functional test. For self-contained units, this involves simulating a power failure for a short period (e.g., 5-10 minutes) to ensure the lights switch on and operate correctly from their batteries. For central systems, this is typically done from a control panel. All emergency lights should activate.
Annual Full Duration Test
- Annually: A full-duration discharge test is required. This means simulating a power failure and allowing the emergency lights to operate on battery power for their full rated duration (e.g., 1 or 3 hours). All lights must remain illuminated for the entire period. If any light fails before the required duration, its battery needs replacement or the unit requires servicing.
Battery Replacement and Lifespan
Batteries are the most common failure point in emergency lighting systems.
- Lifespan: Most emergency light batteries have a lifespan of 3-5 years. After this time, even if they appear to be working, their capacity may have degraded, meaning they won’t last for the required duration during a full discharge.
- Replacement: Batteries should be replaced proactively based on their age and performance during annual tests, rather than waiting for complete failure. It’s often more cost-effective to replace all batteries in a system around the 4-year mark than to deal with individual failures.
- Disposal: Batteries, especially Ni-Cad, contain hazardous materials and must be disposed of correctly according to local environmental regulations.
Record Keeping
Accurate record-keeping is vital. Maintain a logbook for all emergency lighting tests, inspections, and maintenance actions. This should include:
- Date of test
- Type of test (monthly, annual)
- Location of lights tested
- Results (pass/fail)
- Any faults found and remedial actions taken
- Date of battery replacements
- Signature of the person performing the test
These records demonstrate compliance with regulations and are invaluable for troubleshooting or during audits by safety authorities.
Making informed decisions about emergency light size and wattage is a critical aspect of building safety. It requires understanding regulations, assessing the unique needs of a space, and performing careful calculations. By focusing on lumen output, appropriate battery duration, strategic placement, and diligent maintenance, you can ensure that your emergency lighting system provides optimal safety when it matters most, guiding occupants securely out of harm’s way.

Hot Posts
- 10 Stunning Bedroom Design Ideas to Transform Your Sleep Space

- 5Funky Kitchen Gadgets to Keep Your Home Cooking Delicious

- A Home Garden For All Seasons

- Add Warmth and Style to Your Home with a Wooden Pendant Lamp
- Adding Drama to Your Decor With a Pendant XL Light
- Adorable Table Lamp for Kids’ Room

- Affordable Solar Garden Lights: A Smart Purchase
- Amber Glass Minimalist Balcony Dining Lighting